Securing Snowflake with Network Access Policies
At Canvas, we believe data warehouses exist to democratize access to data. Fivetran brings the data from every application your team uses. dbt transforms data from the format your machines prefer to a format humans can understand. Finally, Canvas brings the data to your people.
Serving everyone is the purpose of a data warehouse. Unfortunately, this makes security a greater challenge. Typically, you won’t be able to get away with placing your warehouse behind a private VPC as you might with your application database. Many of your data tools and some of your human users will need the ability to access your warehouse from the public internet.
Network policies
This makes Snowflake’s network policies an essential layer of your security posture. Network policies tell Snowflake to only allow a user access from an enumerated list of IP addresses; traffic from all other sources is blocked.
This prevents an adversary from even attempting to brute force a user’s password unless they can first determine and gain control of the IP address. Because Snowflake only allows access via SSL, spoofing the IP address on network packets is very difficult for an attacker. And even if they could, they would not be able to receive the response (your data) unless they could also compromise the routing back to an IP address they own.
In this post I’ll describe:
- How you can add network policies to your Snowflake users for both your data apps and your human users.
- How you can enforce that all users have a network policy by default.
- How you can monitor your network policy posture in a tool like Canvas.
Creating and attaching network policies
Network policies can be created through the UI or via SQL; we use the latter here. To create the policy we need the list of IP addresses to whitelist. These are typically called Fixed IPs or Static IPs; for most applications, a Google search will turn up the addresses you need.
Let’s say we’d created a user CANVAS_USER for use by Canvas from the IPs listed here. We then run the commands:
CREATE NETWORK POLICY CANVAS ALLOWED_IP_LIST =
('44.224.89.3', '35.80.194.138', '44.241.79.133');
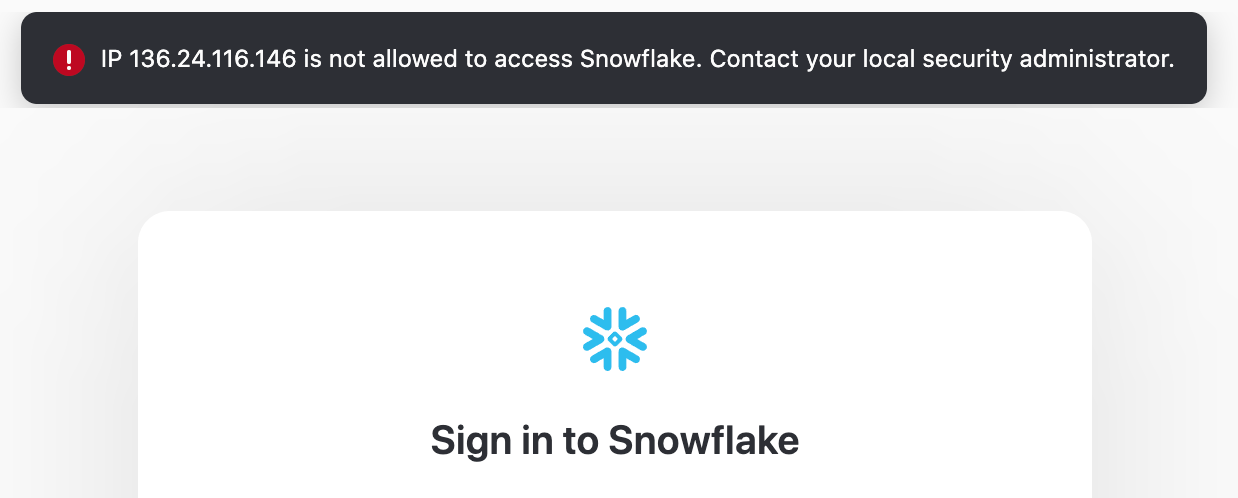
ALTER USER CANVAS_USER SET NETWORK_POLICY = CANVAS;Now, if you attempt to log into the Snowflake console with the user’s credentials you’ll be rejected:
Dynamic IPs
Dealing with human users is trickier. Unless you’re paying for a fixed IP address, the address assigned to your home or office could change anytime (known as a dynamic IP address). And you often want your users to be able to connect to your warehouse from anywhere, not just the home or office.
The state-of-the-art here is to use PrivateLink to connect Snowflake to your cloud environment like AWS or Azure. Then, use DirectConnect to connect your users directly to the private cloud. In this configuration your Snowflake instance only need allow access from the internal network.
Unfortunately, this is quite difficult to set up. An easier solution that still provides many of the security benefits is to use a VPN product like NordVPN or Perimeter81 that can assign you a fixed IP address that you can whitelist. Then your users would log in to this VPN (hopefully using an additional layer of device-level security!) before logging in to your Snowflake instance. In this configuration you whitelist the static IP provided by the service as above.
Enforcing that users have network policies
Snowflake does not provide a way to require that users have a network policy set, in the way that you can set minimum password strength. To enforce that going forward all users have a network policy applied, the best pattern I’ve found is to set an account-level policy that is very restrictive. User-level network policies take precedence over account-level policies; so, to “enable” the user, the creator will have to assign a policy to that user.
Monitoring network policies
If you already have many users without network policies, or want ongoing monitoring of your user’s network policies, you need to be able to list all your users’ policies in one place.
Snowflake does not provide a UI or even a simple command that can list the network policies for every user. User network policies can only be viewed individually using the following command:
SHOW PARAMETERS like 'NETWORK_POLICY' for user "[username]";
Fortunately, Snowflake has an escape hatch for many missing features in Stored Procedures. Stored procedures let us write scripts in more expressive languages like Javascript that can run on our Snowflake compute and can interact with Snowflake data.
The procedure below creates a SNOWFLAKE_METRICS.NETWORK_POLICIES in the current database containing every user and its assigned network policy. This is a modified version of this script provided by the Snowflake community team:
CREATE OR REPLACE PROCEDURE get_user_netpolicy()
  RETURNS variant NOT null
  LANGUAGE javascript
  EXECUTE as CALLER
  AS
  $$
    var METRICS_SCHEMA = 'SNOWFLAKE_METRICS';
    var TABLE_NAME = 'NETWORK_POLICIES';
    var SCHEMA_AND_TABLE = `${METRICS_SCHEMA}.${TABLE_NAME}`;
    try {
      snowflake.execute(
          {
           sqlText: `CREATE SCHEMA IF NOT EXISTS IDENTIFIER(?);`,
           binds: [METRICS_SCHEMA]
          }
      );
      snowflake.execute(
          {
           sqlText: `CREATE OR REPLACE TABLE IDENTIFIER(?) (username varchar(256), network_policy varchar(256))`,
           binds: [SCHEMA_AND_TABLE]
          }
      );
    }
    catch(err){
        return "Failed: " + err;
    };

    // Define initial command to get all user names
    var selectUsers = "SELECT name, disabled FROM snowflake.account_usage.users where deleted_on is null and name != 'SNOWFLAKE';";
    var selectUsersCommand = snowflake.createStatement( {sqlText: selectUsers} );

    // Execute the SQL command
    var userNames = selectUsersCommand.execute();

    // Loop through the results, processing one row at a time...
    while (userNames.next())  {
       var userName = userNames.getColumnValue(1);


       // Create SQL statement to show network policy
       var showPolicy = `SHOW PARAMETERS like 'NETWORK_POLICY' for user "` + userName + `";`;
       var showPolicyCommand = snowflake.createStatement( {sqlText: showPolicy} );

       showPolicyCommand.execute();

       // Use result scan to get the data and account for not truly null values.
       // This SQL uses the UNICODE function to workaround a user with no network
       // policy not returning a true null value
       var getPolicy = `SELECT case when unicode("value") = '0' then 'no_policy' else "value" end FROM TABLE(RESULT_SCAN(LAST_QUERY_ID()));`;
       var getPolicyCommand = snowflake.createStatement( {sqlText: getPolicy} );

       // Execute command to get network policy
       var netPolicy = getPolicyCommand.execute();
       netPolicy.next();
       var netPolicyName = netPolicy.getColumnValue(1);

       try {
          snowflake.execute(
              {
               sqlText: `INSERT INTO IDENTIFIER(?) VALUES (?, ?);`,
               binds: [SCHEMA_AND_TABLE, userName, netPolicyName]
              }
          );
        }
        catch(err){
            return "Failed: " + err;
        };
     }
  $$
;
CALL get_user_netpolicy();
Now I can bring this table into my favorite BI tool (Canvas!) to start visualizing my policy enforcement:
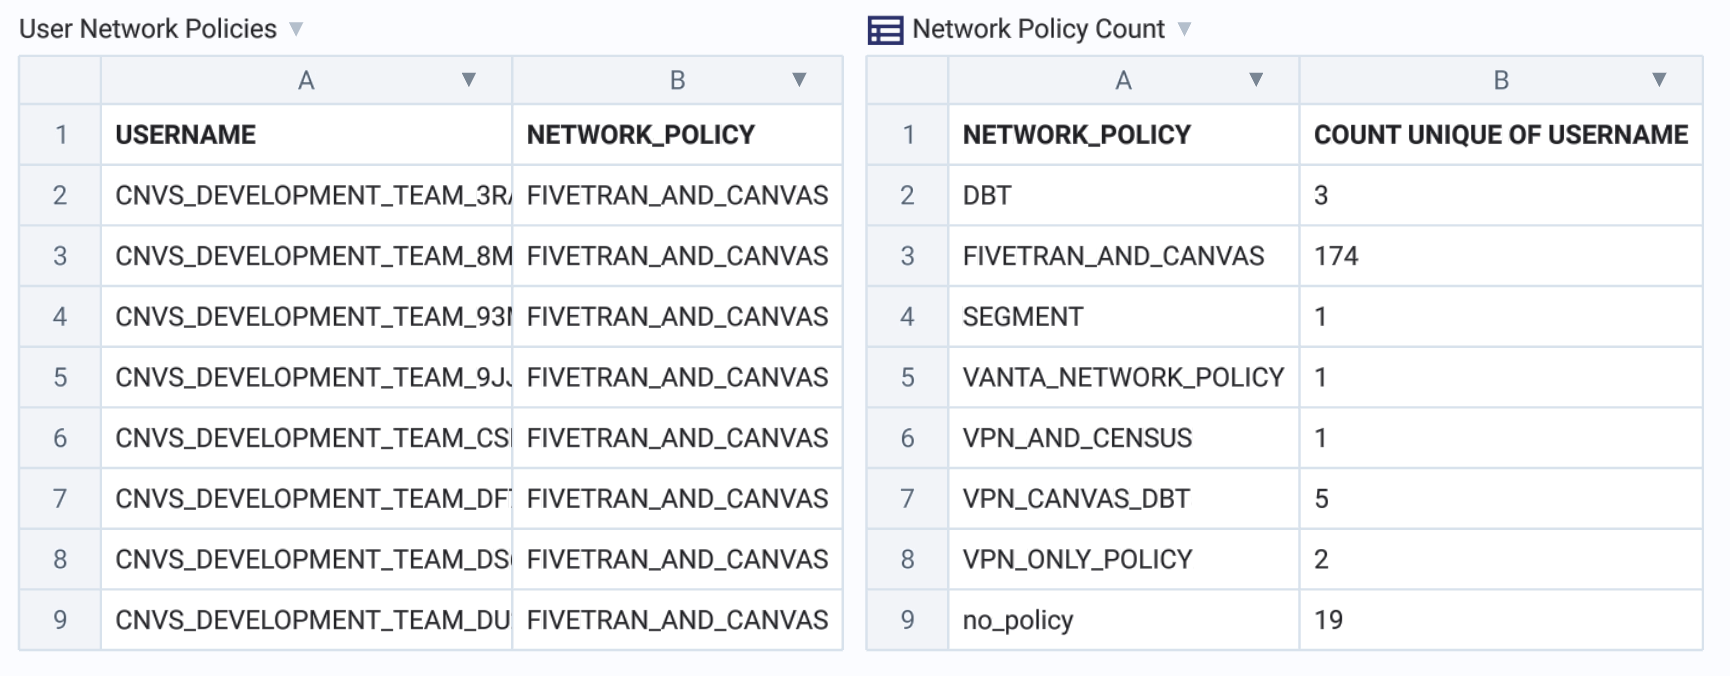
From here you can begin clicking into the different network policies and filtering your policies table to better understand your instance’s access control, or set up alerts for when users of a certain age still have no network policy.
Final thoughts
No single security measure can ever be foolproof, but each additional security layer makes compromising the entire system exponentially more difficult. IP whitelisting aligns with the Zero Trust maxim of “Deny all, permit by exception”. This simple change will greatly reduce the vulnerable surface area of your Snowflake instance.
If you’d like to learn more about setting up a dashboard for monitoring user access - or if you’d like us to just set up your entire warehouse for you - please drop me a line!